Setting the view
You can choose different views for the Drawing Window:

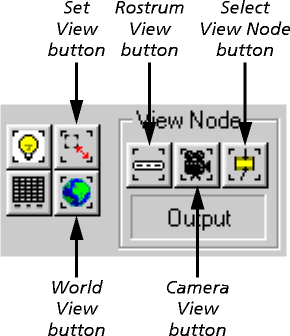
- Click on the World View button to set a view large enough to show all elements of every frame of the scene - whether on or off camera. If your scene is long or complex, it may take a while to calculate the required size, in which case a progress panel keeps you informed.
- In this view, the Drawing Window keeps the camera outline in a fixed position; moving the camera changes the position of the artwork on the rostrum. It is the same as selecting the Camera node as the view node (see Select View Node below).
- Click on the Rostrum View button to see the scene looking down on the rostrum from above the camera.
- In this view, the Drawing Window keeps the artwork on the rostrum in a fixed position; moving the camera changes the position of the camera outline. It is the same as selecting the Camera node as the view node (see Select View Node below).
- Click on the Select View Node button to center the view on the Drawing Window's currently selected node. (You select nodes by clicking on their borders or tags; see Selecting nodes in the Drawing Window.)
- Click on the Set View button to set precisely the center and size of the view. In the Set View panel that appears, choose the Unit Type you wish to use, and then type the E/W and N/S offset for the center, and the Size:

